Usage
Nuido offers two primary ways to integrate its UI functionality:
- Extend the
NuidoUicomponent and register it as client action. - Use
NuidoUias sub-component in a client action component.
In both approaches, the procedure for creating a node-based UI are similar.
Component Definition and Registration
Defining Nodes
To create a new node, define both the UI component and the model representing its logic and data.
js
export class DumbNode extends DemoNode {
    static template = "nuido_demo.dumb-node";

   // You can add sub-components or logic just like in any Owl component.
}

export class DumbNodeModel extends NodeModel {
   setup(){
        const inId = "in-" + this.id +  "-1";
        this.addInPort(inId, Default, 1);

        const outId = "out-" + this.id +  "-1";
        this.addOutPort(outId, Default, 1);
    }
}
Since Nuido nodes are built on Owl, all Owl features are applicable. For example, you can define templates either inline or as external XML files.
xml
<t t-name="nuido_demo.dumb-node" t-inherit="nuido.node" t-inherit-mode="primary">
   <xpath expr="//div[hasclass('node-content')]" position="replace">
      <div class="node-content" t-att-style="contentStyle">
      <!-- Custom content here -->
      </div>
   </xpath>
</t>
Defining Edges
To create a custom visual connection between nodes, define new classes extending Edge and EdgeModel. Below is an example of a curved edge implementation.
js
export class DemoCurvedEdge extends Edge {}

export class CurvedPath extends PathModel {
    // Adapted from https://stackoverflow.com/a/45245042
    createPath(startX: number, startY: number, endX: number, endY: number): string {
        // L
        let BX = Math.abs(endX - startX) * 0.05 + startX;
        let BY = startY;

        // C
        let CX = startX + Math.abs(endX - startX) * 0.33;
        let CY = startY;
        let DX = endX - Math.abs(endX - startX) * 0.33;
        let DY = endY;
        let EX = -Math.abs(endX - startX) * 0.05 + endX;
        let EY = endY;

        const svgPath = []
        svgPath.push("M", startX, startY);
        svgPath.push("L", BX, ",", BY);
        svgPath.push("C", CX, ",", CY);
        svgPath.push(DX, ",", DY);
        svgPath.push(EX, ",", EY);
        svgPath.push("L", endX, ",", endY);

        const res = svgPath.join(" ");

        return res;
    }
    svgPath(): string {
        const res = this.createPath(
            this.vprops.startX,
            this.vprops.startY,
            this.vprops.endX,
            this.vprops.endY
        );
        return res;
    }
}

export class DemoCurvedEdgeModel extends EdgeModel {
    static get pathClass(): typeof PathModel {
        return CurvedPath
    }
}
Interface to Create Nodes
The next step is to provide a way to add nodes to Nuido, for example you can provide a sidebar or a menu.
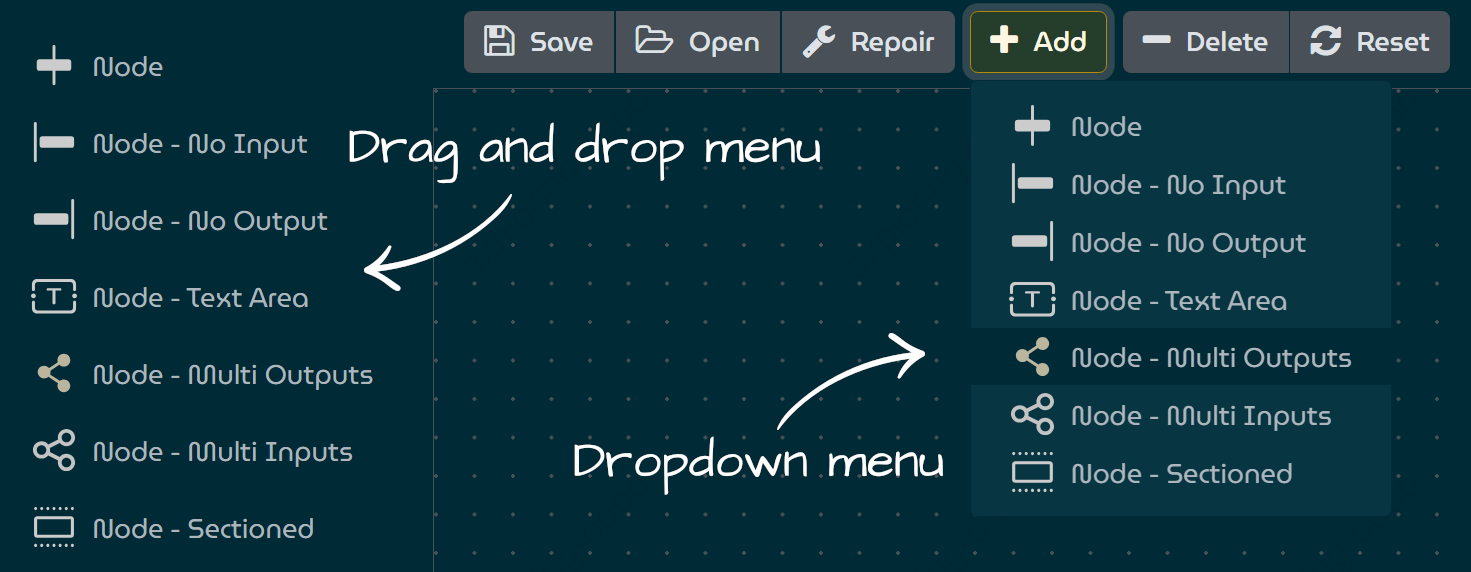
Menu Types Example
Demo App
For a full working example, refer to the Nuido Demo.
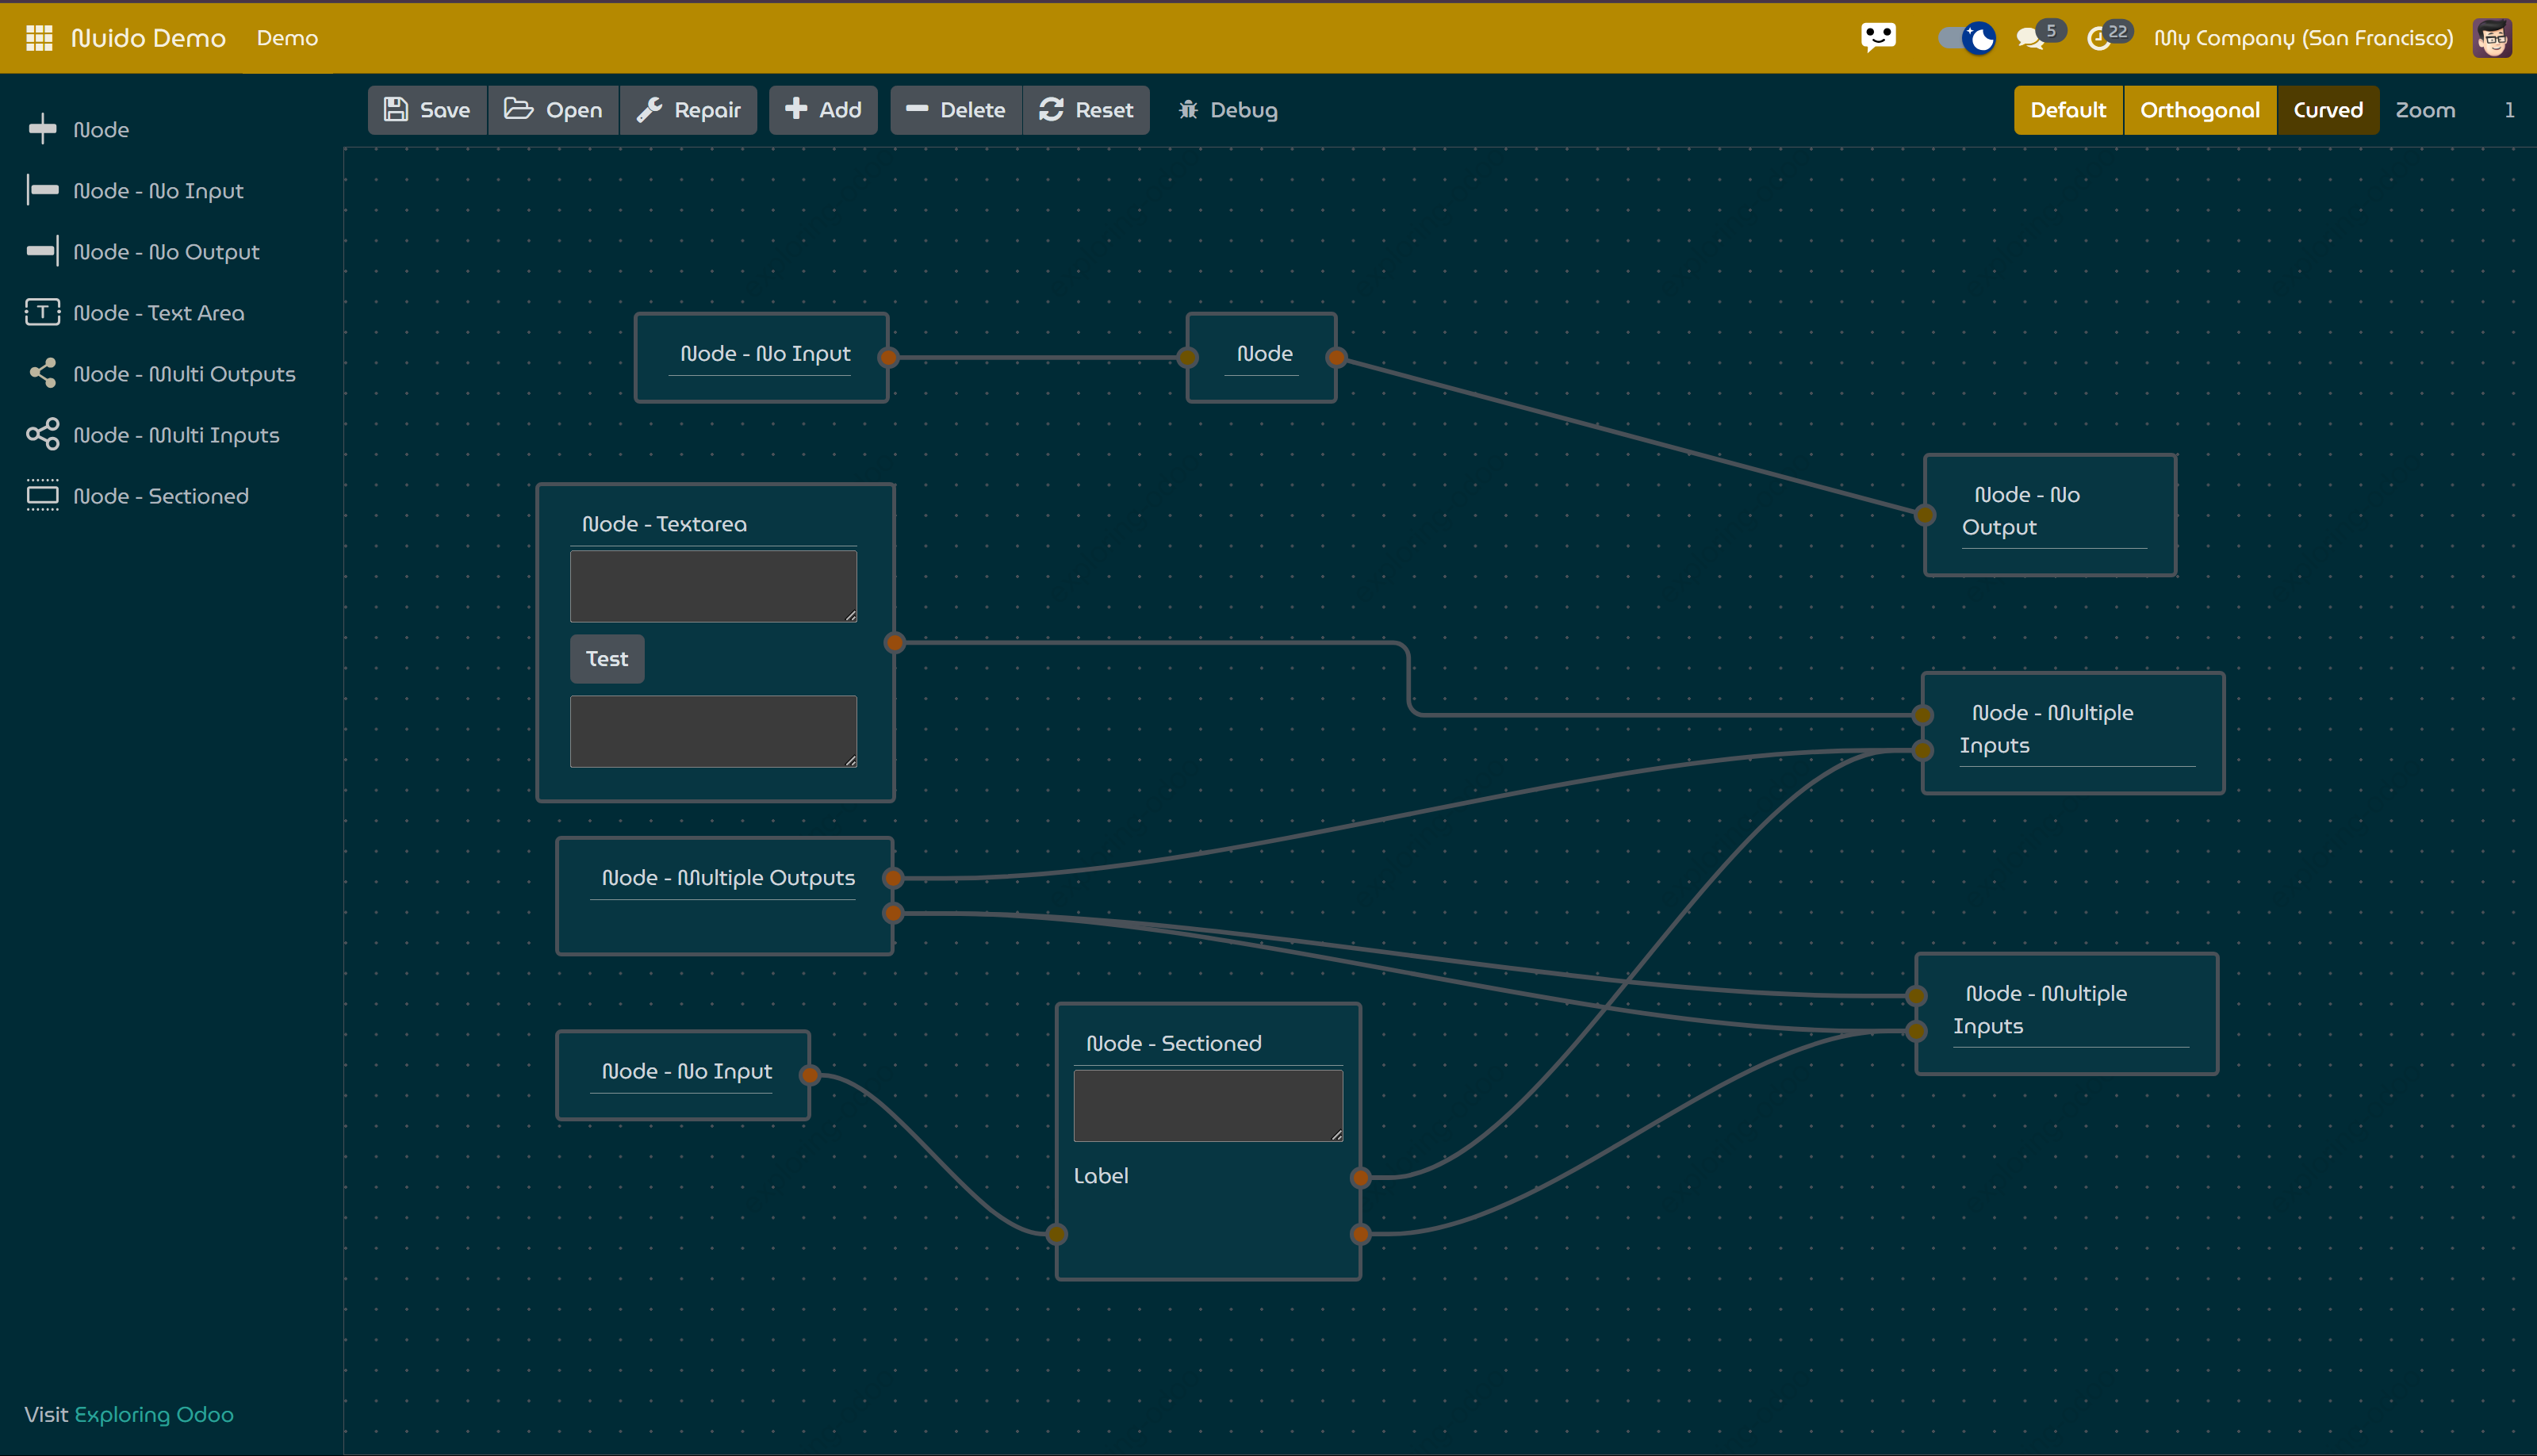
Nuido Demo